Using Network Link Conditioner for Network-based Testing
- Ringzero QA

- Sep 16, 2020
- 2 min read
Introduction
Network Link Conditioner is a tool of Xcode for Apple devices which allows setting up Internet limitation via a Wifi signal.
It's very useful for testing any tasks related to an Internet connection.
Normally, we use Network Link Conditioner under the following conditions:
Wifi enabled with 0 Internet speed to both upload and download
Slow speed Internet for sending less package files
Moderate Internet speed with a bad latency Internet connection
Preparation
Hardware: Mac, iPhone or iPad
Software: Xcode
Setup
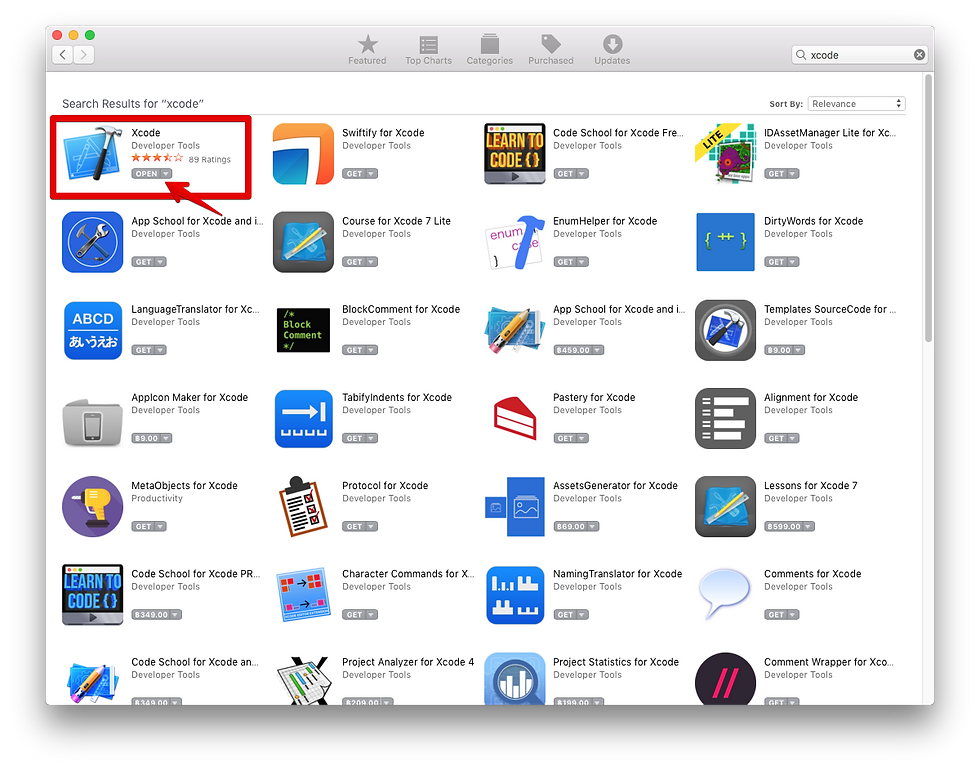
Install Xcode - It's available from Apple Store or the Apple Developer website. Installing from the Apple store is recommended.
To install from the Apple store, go to iTunes and search 'Xcode' for Mac devices.

After installing Xcode, open it and go to Xcode > Open Developer Tool > More Developer Tools

You will be directed to the Apple Developer site.
Login with the developer account


You will be directed to a download page. At the list of downloads, find 'Additional Tools for Xcode' x.x
Expand it and download the .dmg file.
Install the .dmg file. It includes many tools including Network Link Conditioner
Using Network Link Conditioner
Once you install the Xcode tool, go to System Preferences and there will be the Network Link Conditioner displays.

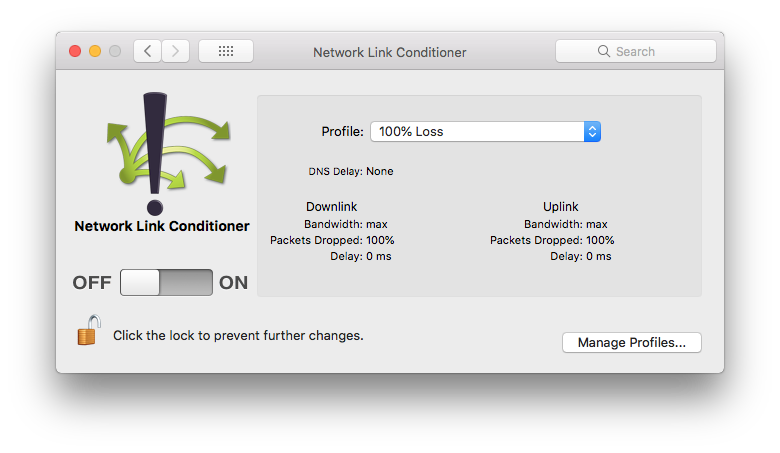
Open Network Link Conditioner

This is the main UI of Network Conditioner. Default will be set as OFF.
Usage:
Click the Profile drop down list to see profiles and choose Internet speed.

Choose 1 available profile, or click Manage Profiles... to add more conditions.

Swipe to ON to make changes; check Downlink and Uplink to estimate Bandwidth, Package Dropped and Delay.
After switching on, check Internet speed at websites such as http://www.speedtest.net/
Setup Mac for sending Wifi
On a Mac, it allows to create internet sharing for other devices override with internet connection from Network Link Conditioner

Go to System Preference > Sharing

At the main page of Sharing, click Internet Sharing from the left side and then enable Wi-fi

Click the 'Wi-Fi Options...' button to configure Internet sharing
Configure Network Name, Password and Verify. Keep Channel and Security as 11 and WPA2 Personal
Click the OK button to save settings

Enable the Internet Sharing checkbox
Click Start to turn on Internet sharing

Check any device which can connect Wi-Fi; there is a Wi-Fi list available as seen above.
Choose the network and input password to connect to Wi-Fi.
Using Network Link Conditioner from iPhone or iPad device
There is alternative way to use the Network Link Conditioner - from an iPhone or iPad device.
We can setup the device to enable a Personal Hotspot to other devices when connected to this Wi-Fi.
Setup
Connect an iPhone or iPad to a Mac with a USB cable.
Open Xcode; wait until Xcode finishes opening

Check Settings of the device; there is a Developer option display

At the Developer screen, check Network Link Conditioner


Comments